
Detailed Troubleshooting Steps
Note:
- If you're using multiple checkin stations with Brother printers and the devices keep switching to another printer, use a different volunteer account for each checkin station.
- You must use label size 1.14 x 3.5in or the printer will not work.
STEPS:
- Make sure you're logged out of the Kidmin Printer app.
- Log in to your Kidmin App dashboard via a web browser, using the same credentials you will use for the Kidmin Printer app.
- Double check the church settings page that it's set to "Brother" for the printer vendor.
- Make sure you have an available service and class set up so you can conduct a test print later on - you can delete later or just hold onto for future testing if needed.
- Plug in the Brother printer power cable, and then plug the USB into your computer via the adaptor. Single green light over power button should be on.
- Go to your Mac's "Printers & Scanners" and make sure the QL-800 is showing up there with a green idle light. Should look like this:
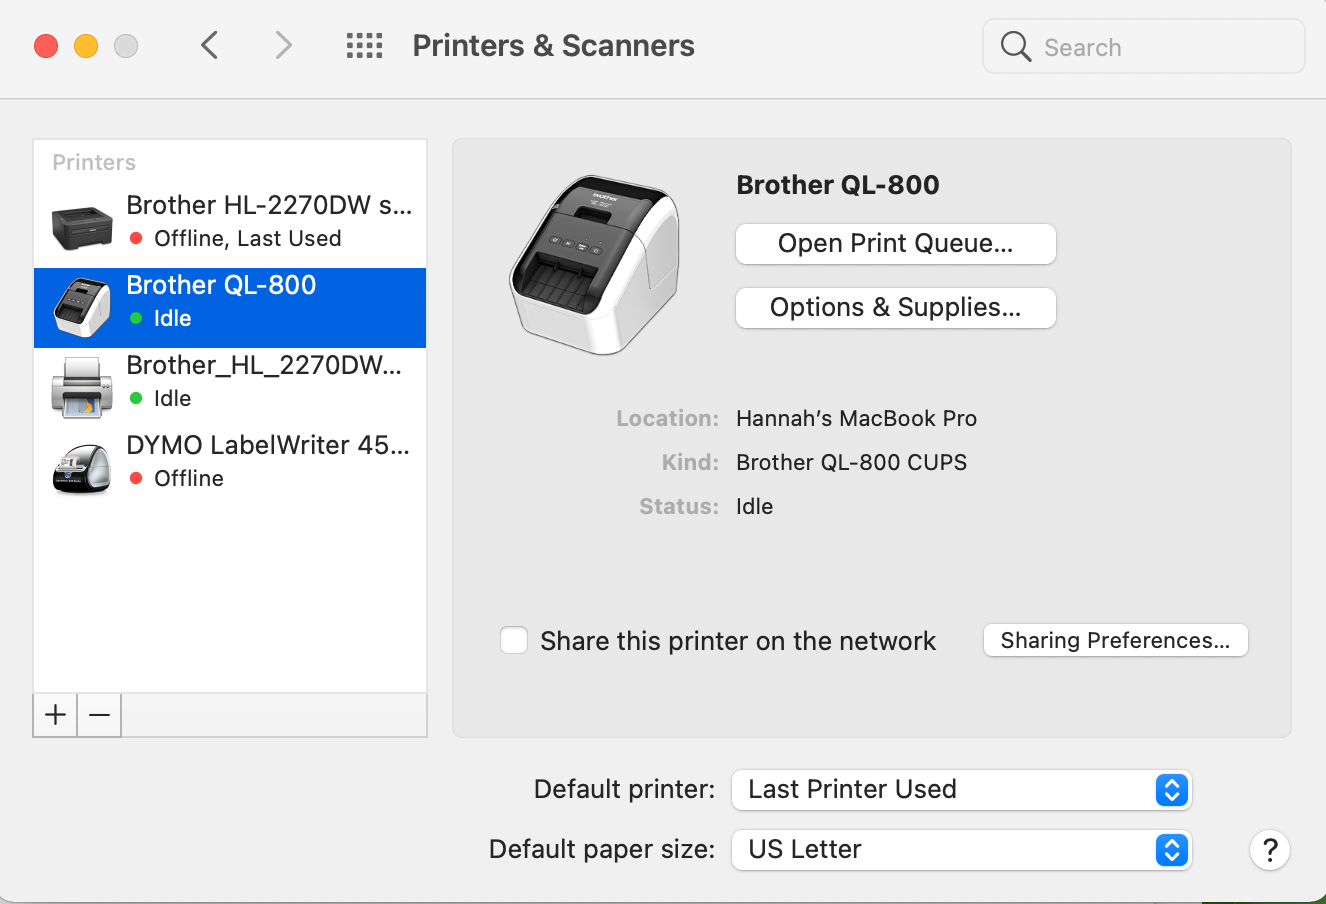
- Go to your Mac's "Printers & Scanners" and make sure the QL-800 is showing up there with a green idle light. Should look like this:
- Open up the Kidmin Printer app and log in and name the printer.
- Click blue "check status" - should print label that says "Sample Label" and the status message will then change to "connected & idle."
- Go to the Desk Checkin page. From the "Printing to" dropdown on the right side of the page select the printer you just set up. *Might need to refresh page.
- Run a test check-in (easiest way is to just check yourself into the test service as a volunteer so you don't mess with any of the children's attendance history). If the volunteer label prints, you're good to go.
If you continue to have printing issues, please email us at help@kidminapp.com. If possible, please reference this article, which step you're stuck on, and include screenshots. This can make it easier and quicker to figure out where the problem is.