(Not using MacOS? Check out our install instructions for Windows HERE.)
This article covers the following:
- Part 1: Install the Kidmin Brother Printer app on your computer
- Part 2: Connecting the Brother Printer to your KidMin App account & printing tags
- Part 3: Enabling express checkins on Brother Printer
The Kidmin App supports Brother printers, specifically the Brother QL-800 (use with the 1.14 x 3.5in labels).
Part 1: Installing the Kidmin Brother Printer app
- Log in to your account & go to our printer help page.
- Select that you are using a “Brother” printer from the dropdown and click on the download for your Operating System. (Or click HERE.)
- Click “Allow” if permission request appears.

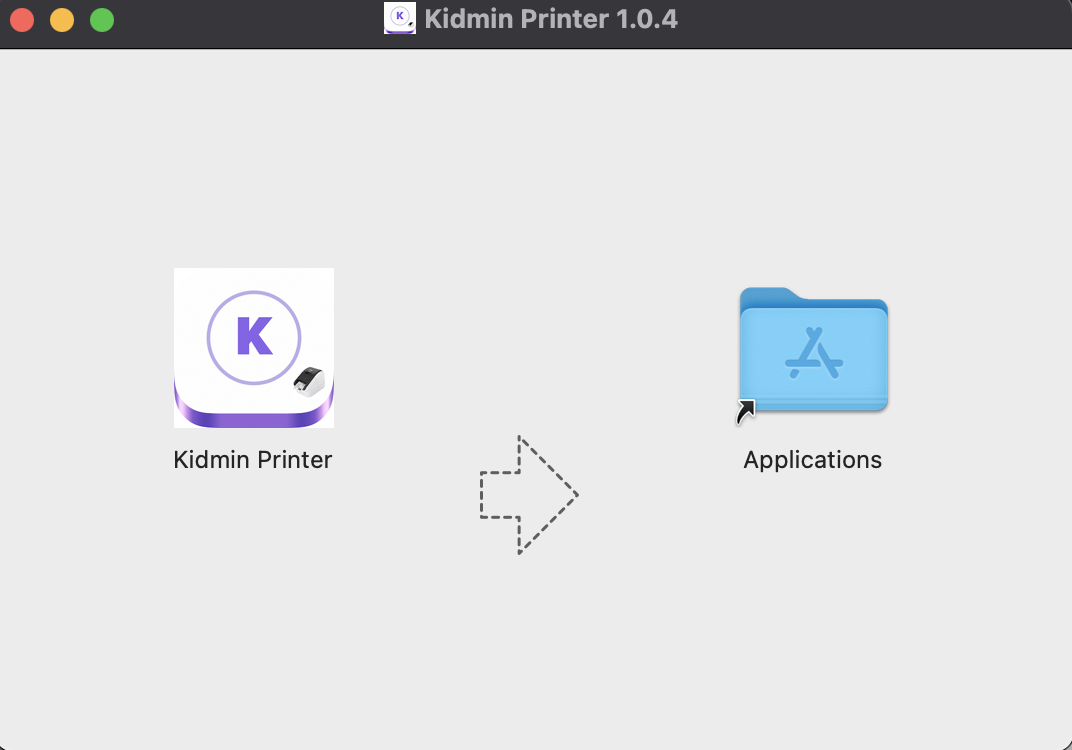
- Double click the download file (.dmg) to run the installer. After it finishes downloading, move the application into your Application folder.
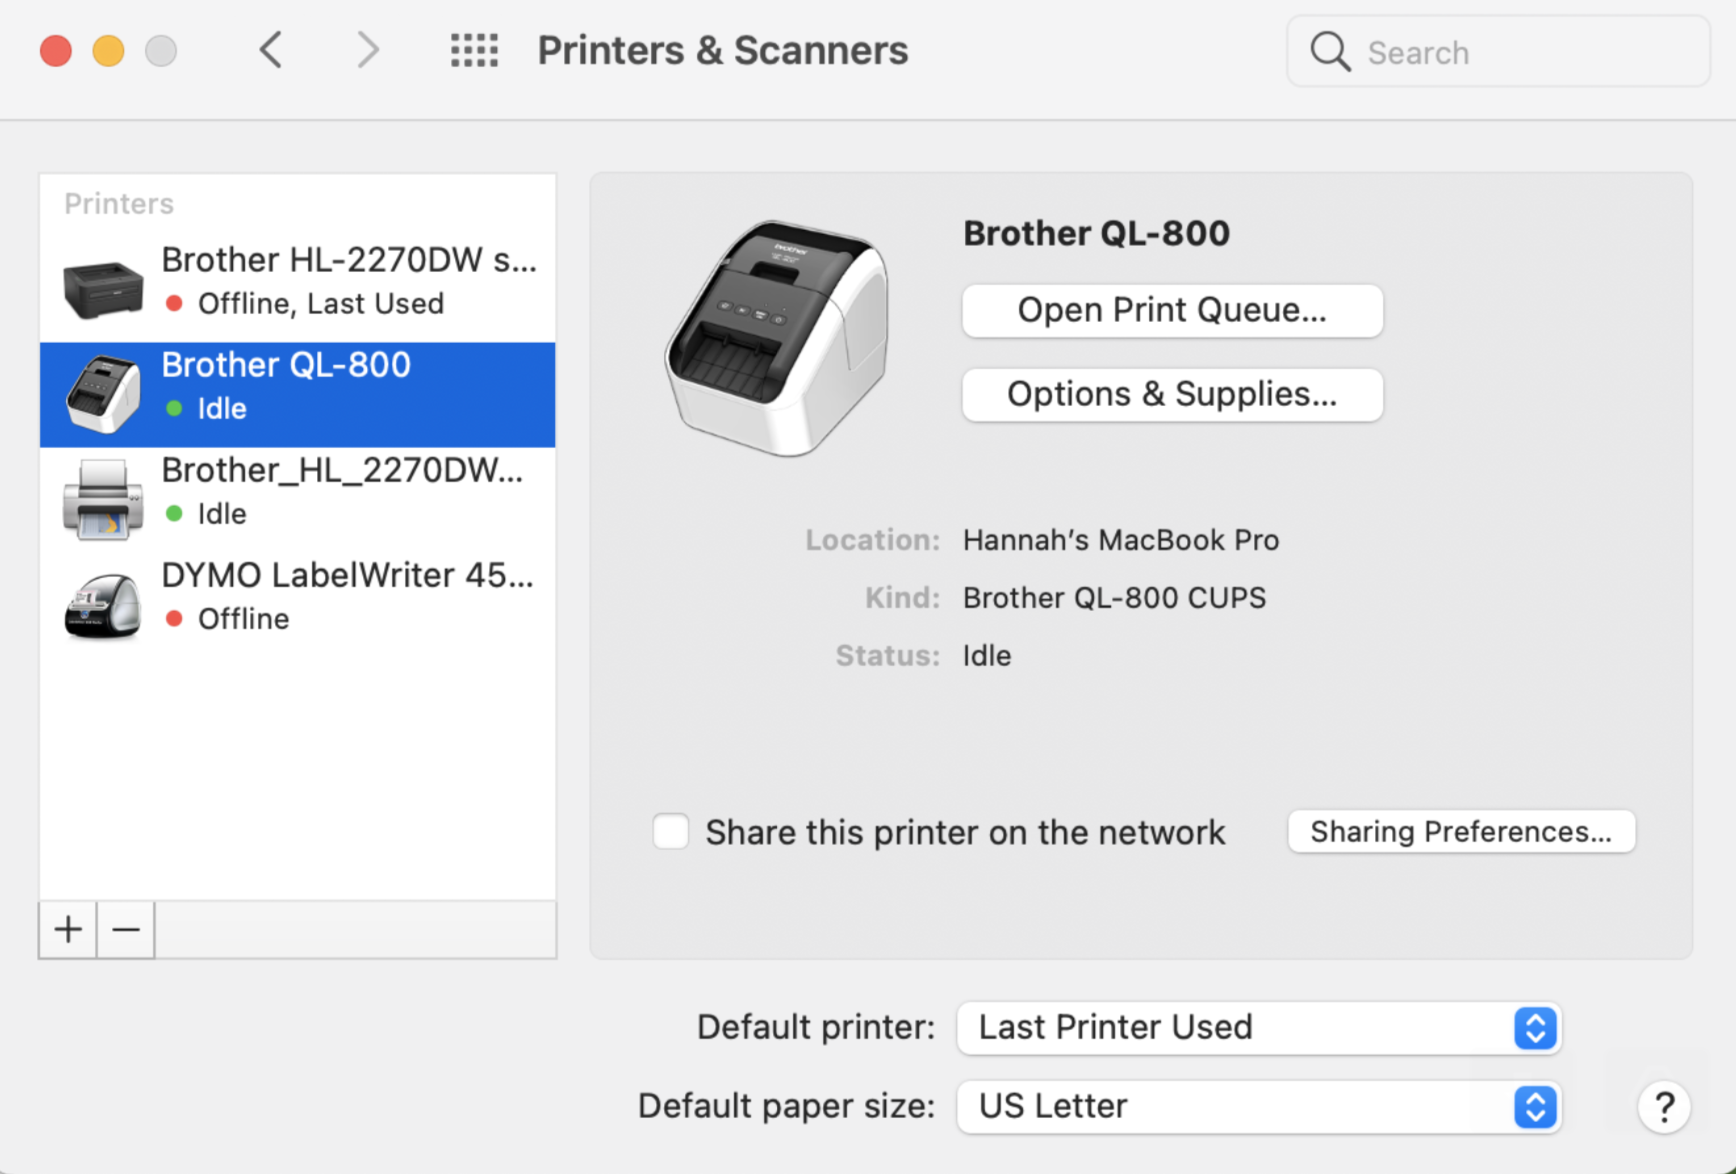
- Plug in your Brother printer and ensure it is powered ON (single green light) and connected to your computer via USB. Go to your computer's "Printers & Scanners" folder and make sure the QL-800 appears with the status "idle." If it doesn't, you'll need to add the Brother QL-800 driver. Hit the + button and as long as the printer is plugged in to your computer, you will be guided through the driver install steps.)
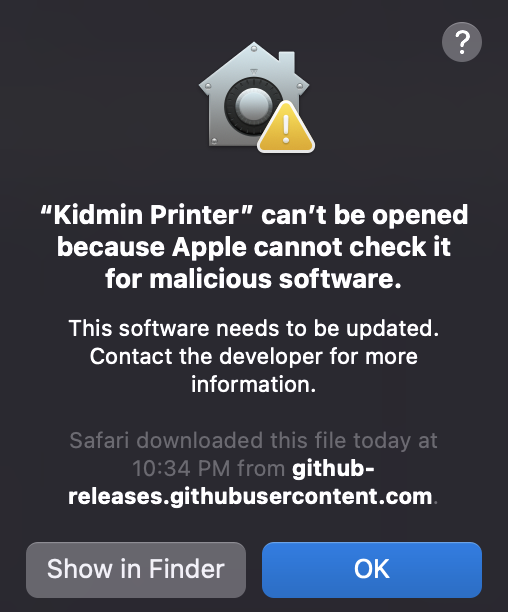
- Double click on Applications folder. Find “Kidmin App” from list and double click it. You’ll get a message that says “Kidmin App can’t be opened because Apple cannot check it for malicious software.”
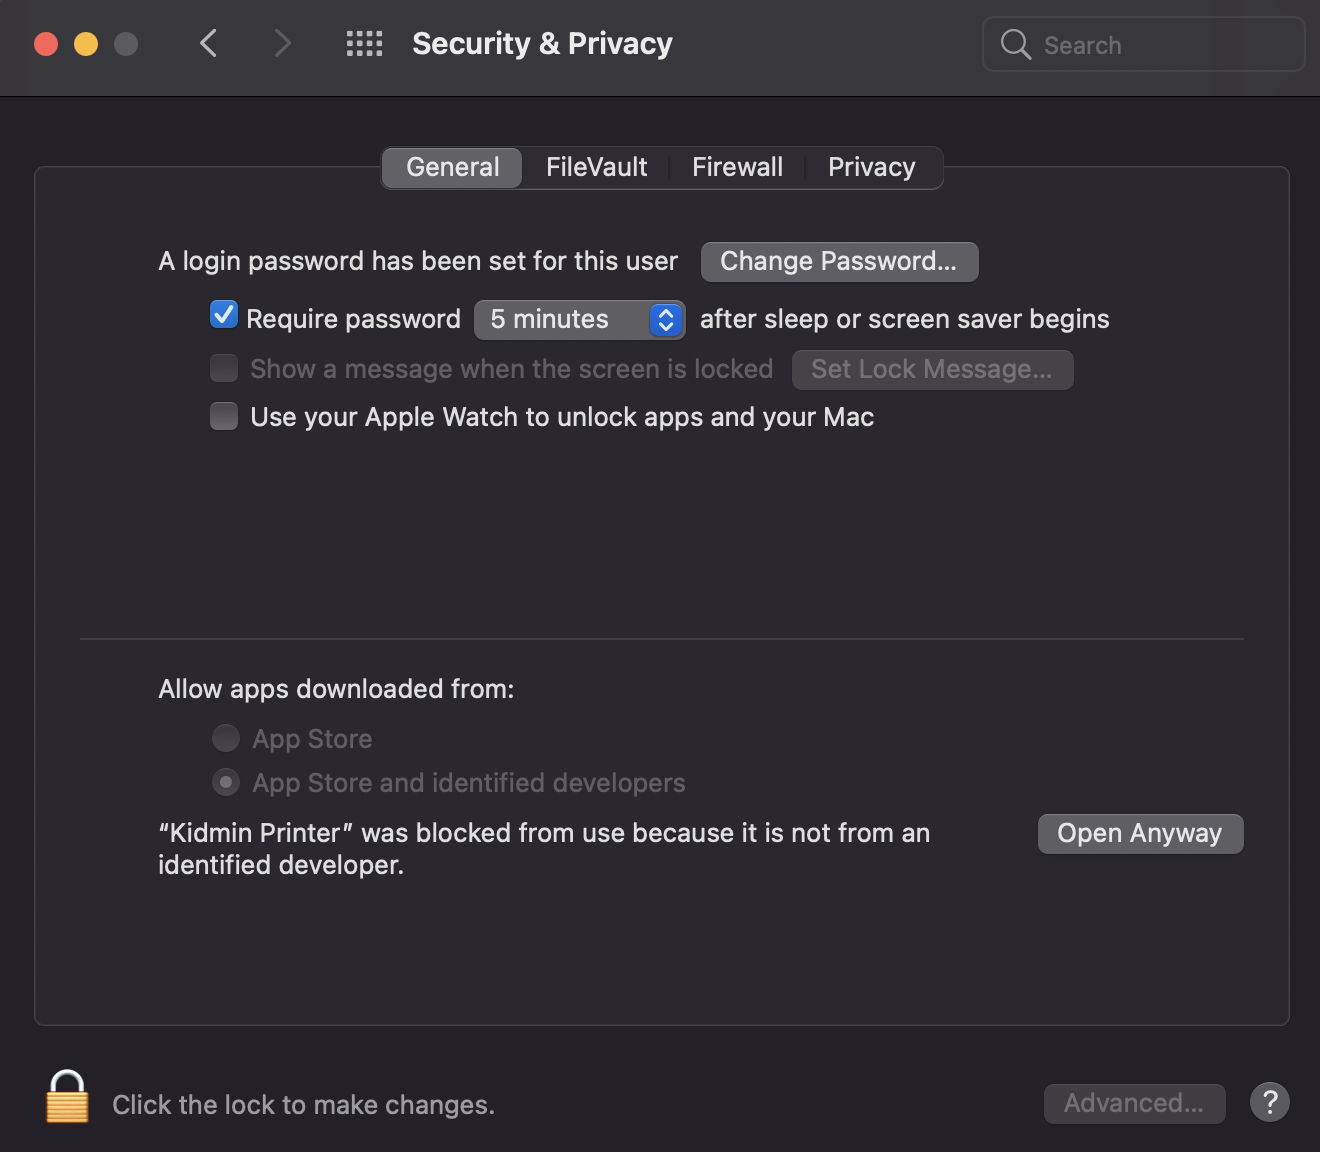
- Go to your System Preferences --> Security & Privacy --> at the bottom of the “General” tab you'll see a message about Kidmin Printer. Click “Open Anyway.”
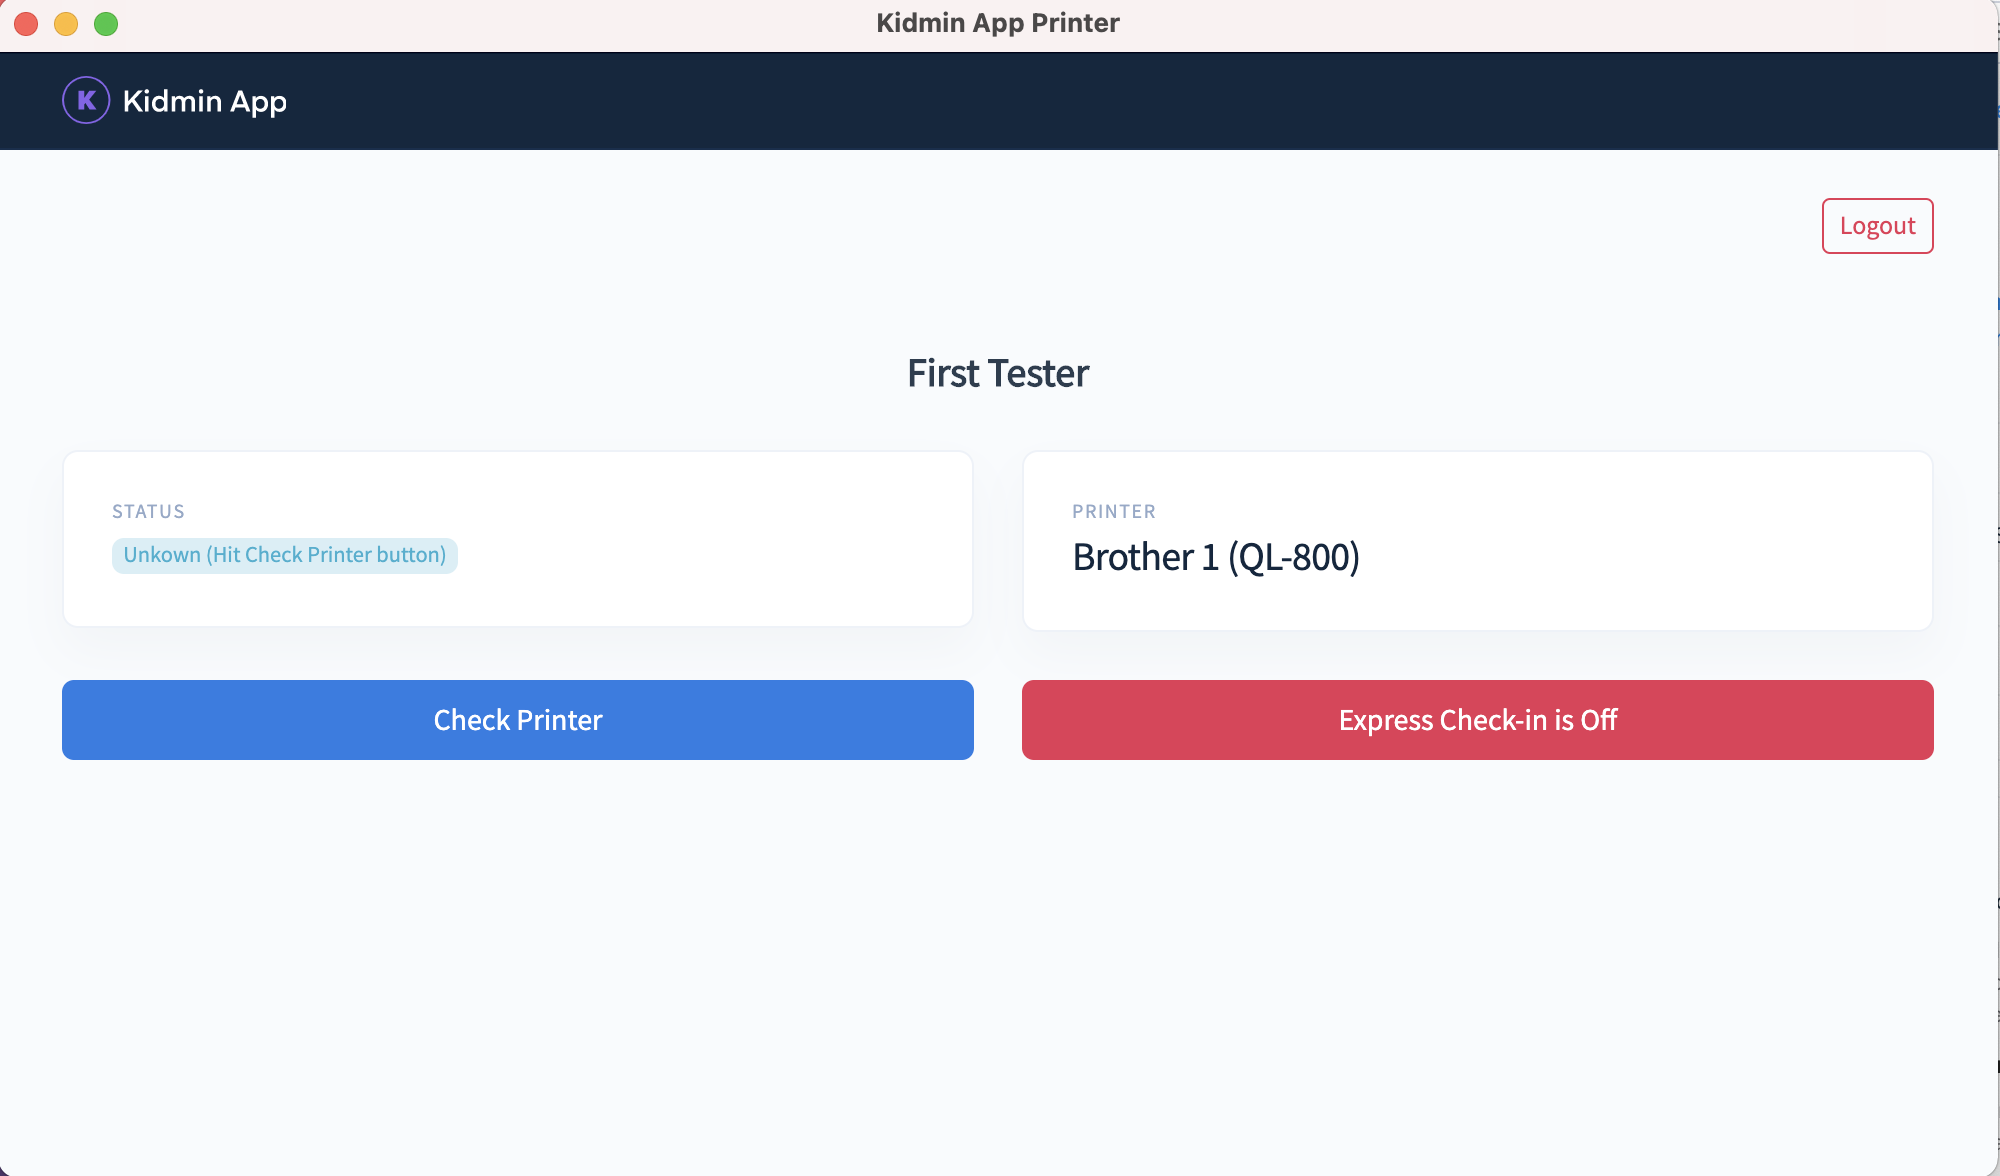
- The app will open to a page that shows a check printer button and whether or not express checkins are enabled. For your first use, click logout (this will close the app automatically).
Part 2: Connecting the Kidmin Brother Printer app to Your Account & Printing Tags
Recommended before connecting: 1) Make sure you are logged in to your KidMin App account via a web browser. 2) Have a service and class time available to run a test volunteer checkin to.
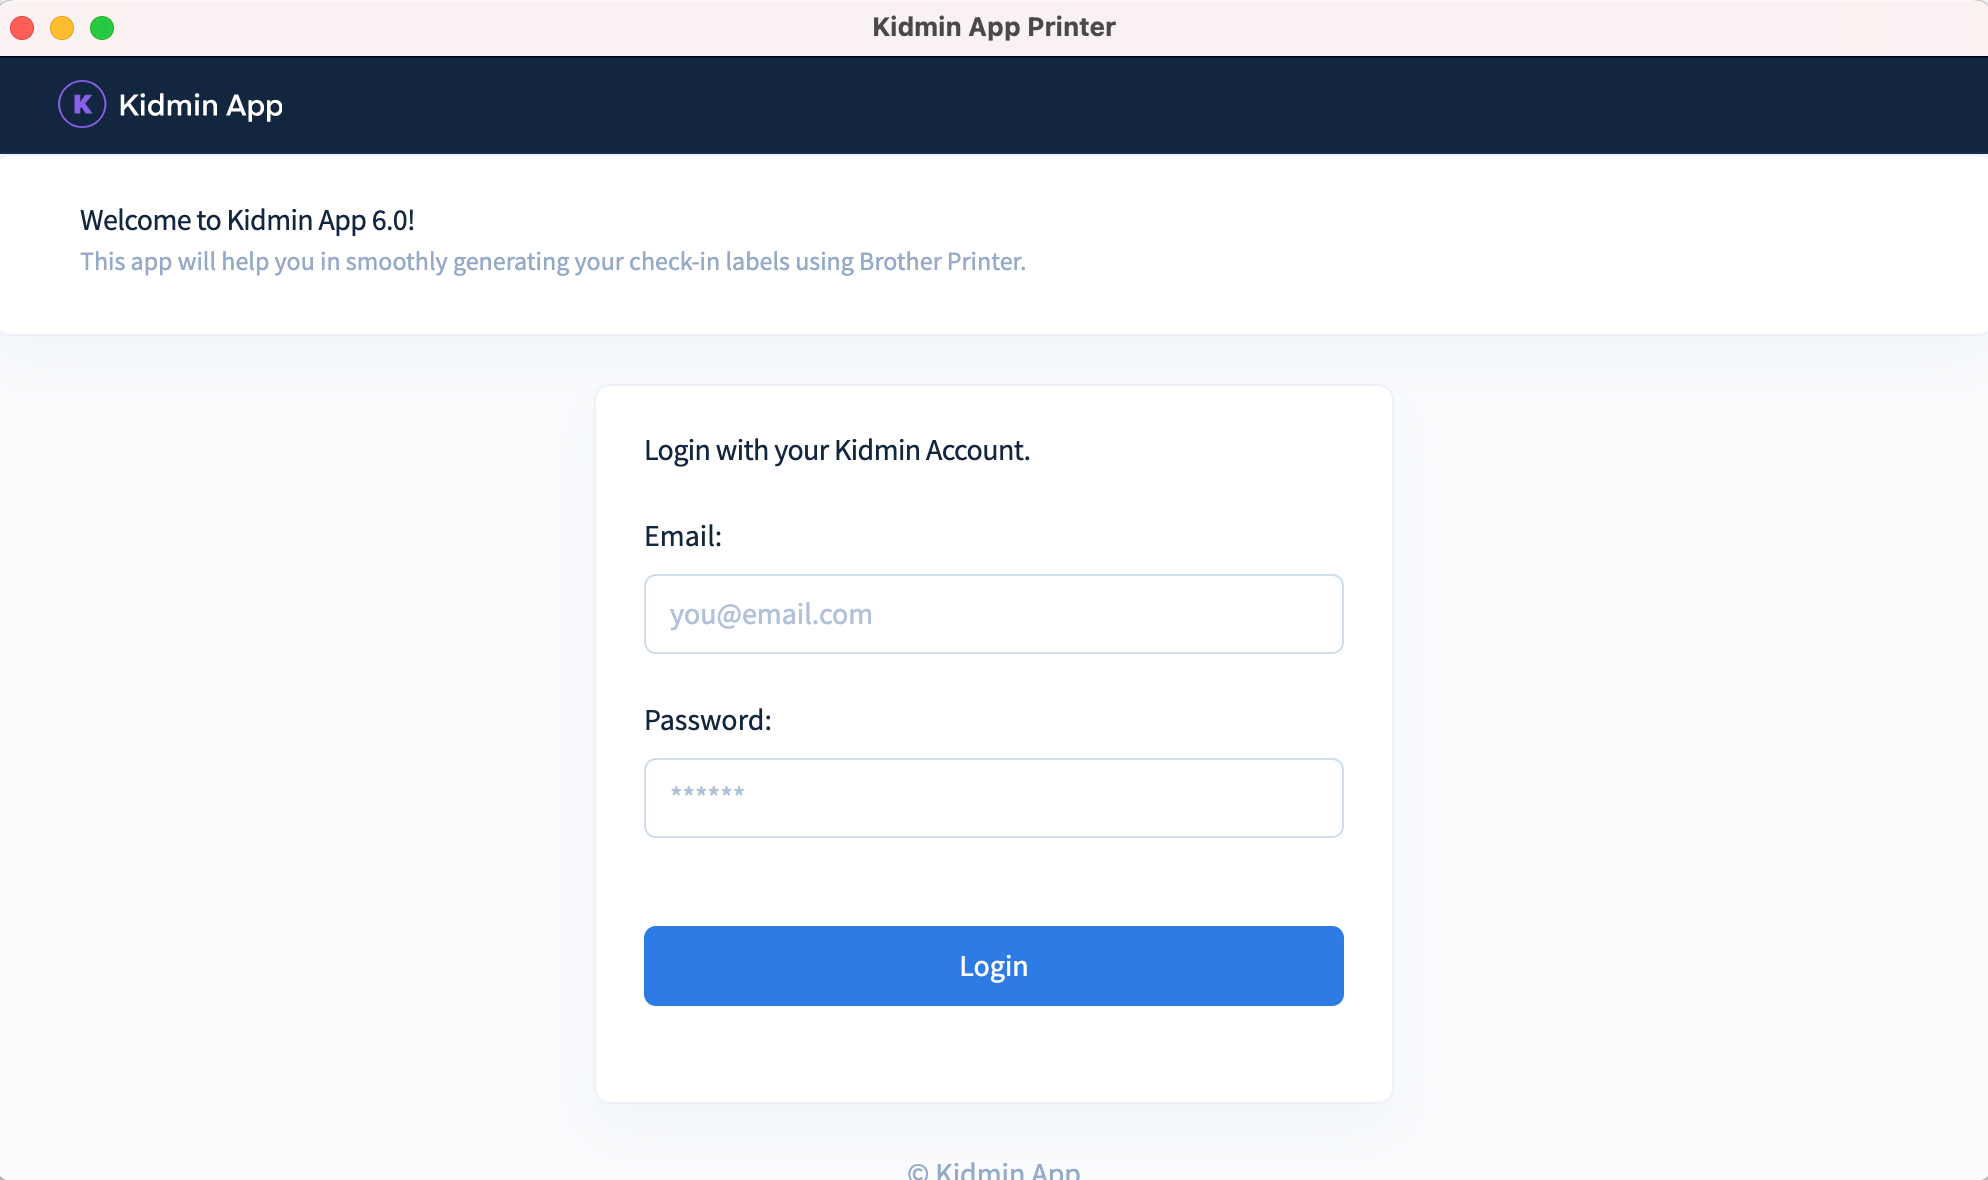
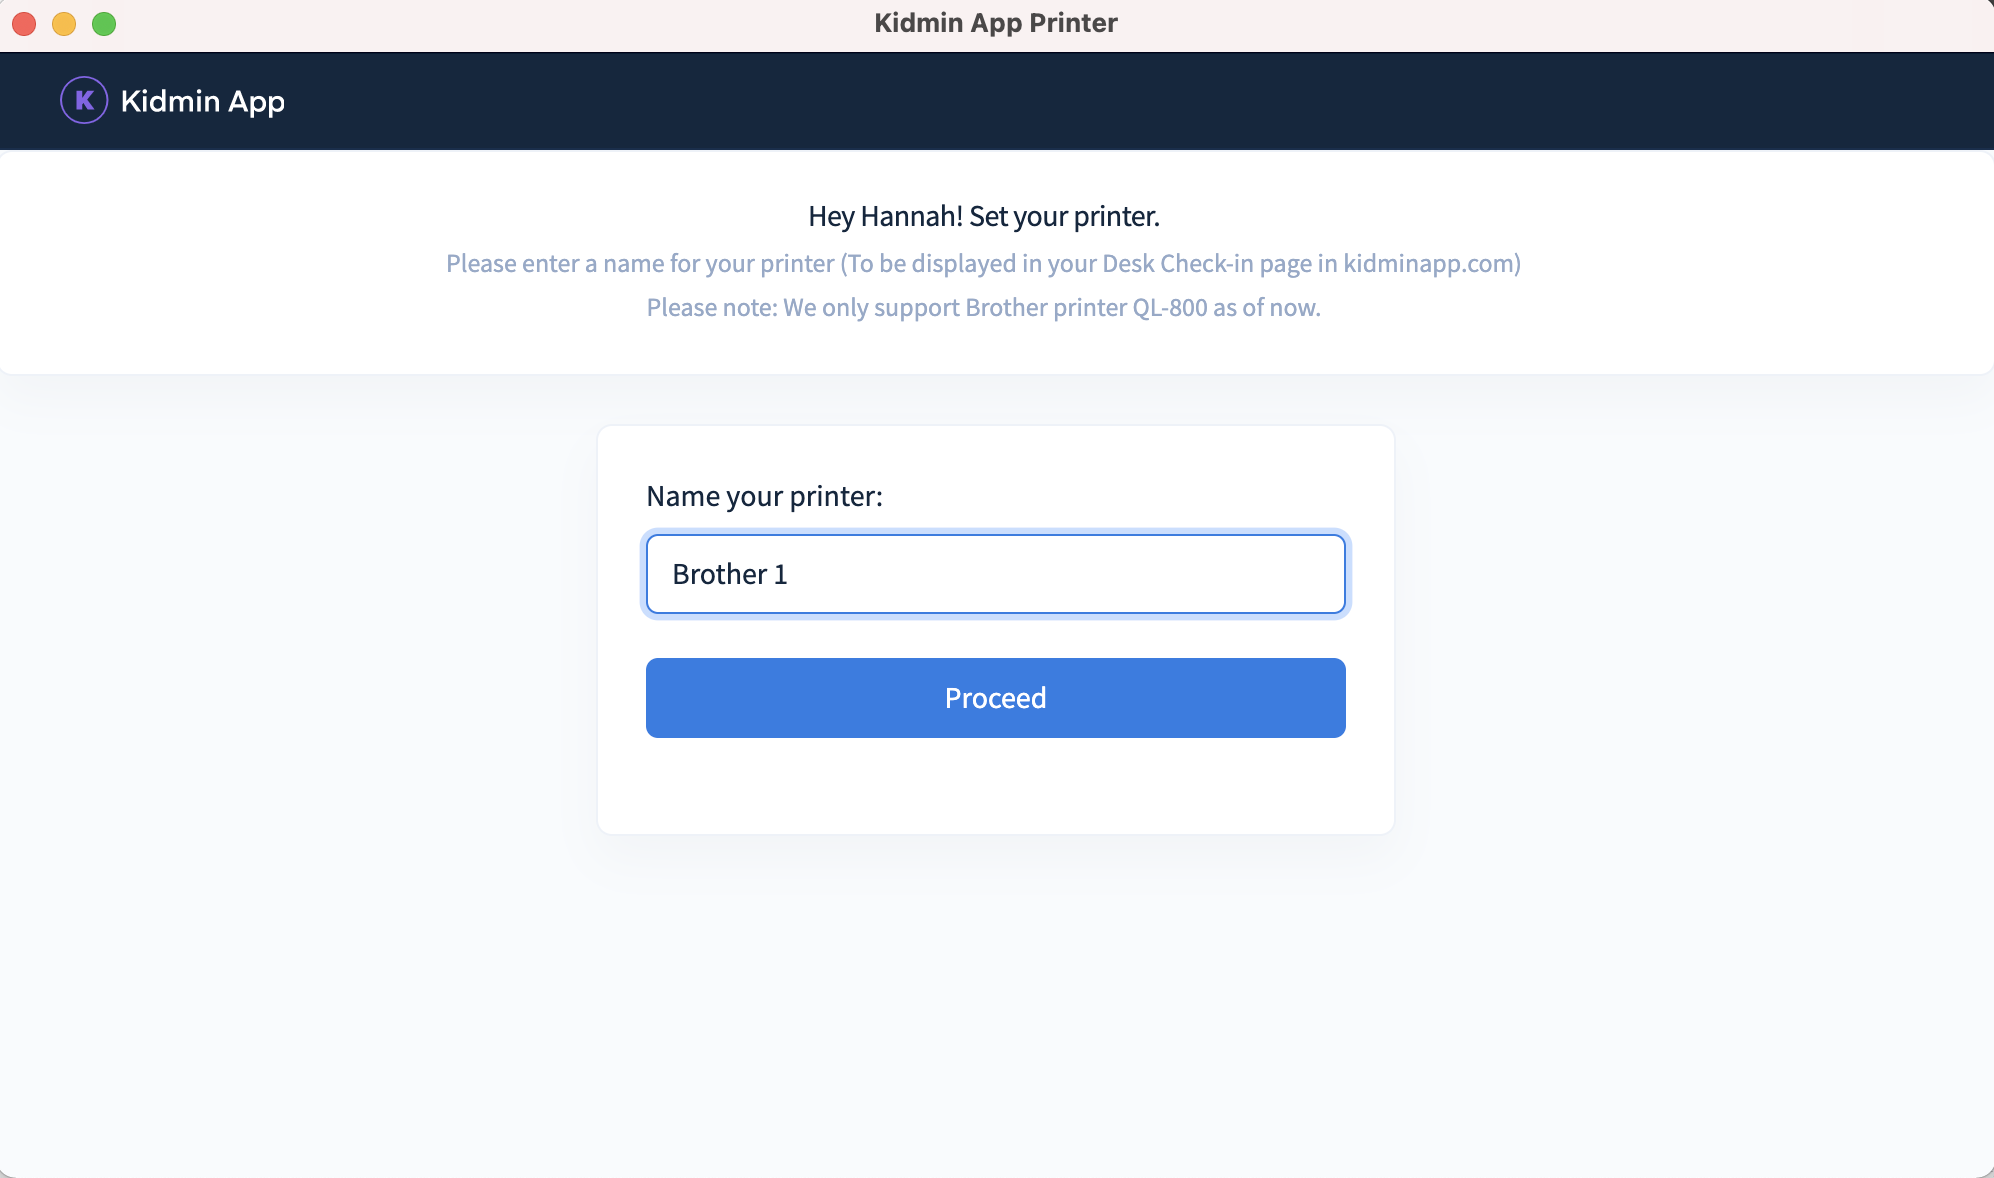
- Double click the Kidmin Printer app icon to open. Log in with your Kidmin App account credentials. On the next screen you will enter a name for the printer you're setting up (this is helpful when using printers in different locations or if you have one that you dedicate to express checkins, etc).
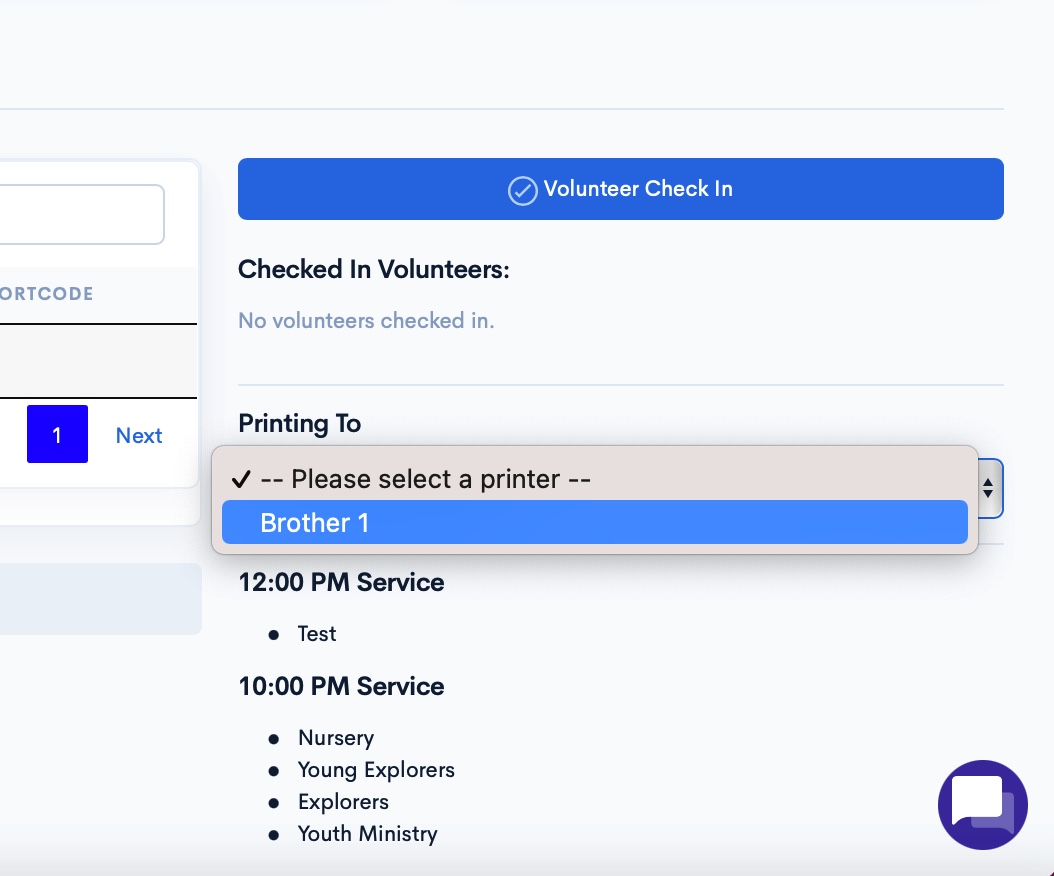
- Go to your Kidmin App dashboard in your web browser to to the desk checkin page. On the right side from the Printing To dropdown menu, select the printer you want to print to (you will see the name of the printer you just set up appear). You may need to refresh the page for it to appear. **If the printer name does not appear even after refreshing, log out of the Kidmin Printer app and disconnect the Brother printer from your computer. Then reconnect the printer via USB to your computer and redo step #1 above.
- Go back to the Kidmin Printer app and click blue “Check Printer” button. A sample label will print, signifying that your printer is connected successfully and ready to print.
- You're all set for checkins to print! A simple way to test this is to check yourself in as a Volunteer Check using the blue Volunteer Check In button on the right side of the Desk Checkin Page.
Part 3: Enabling Express Checkins
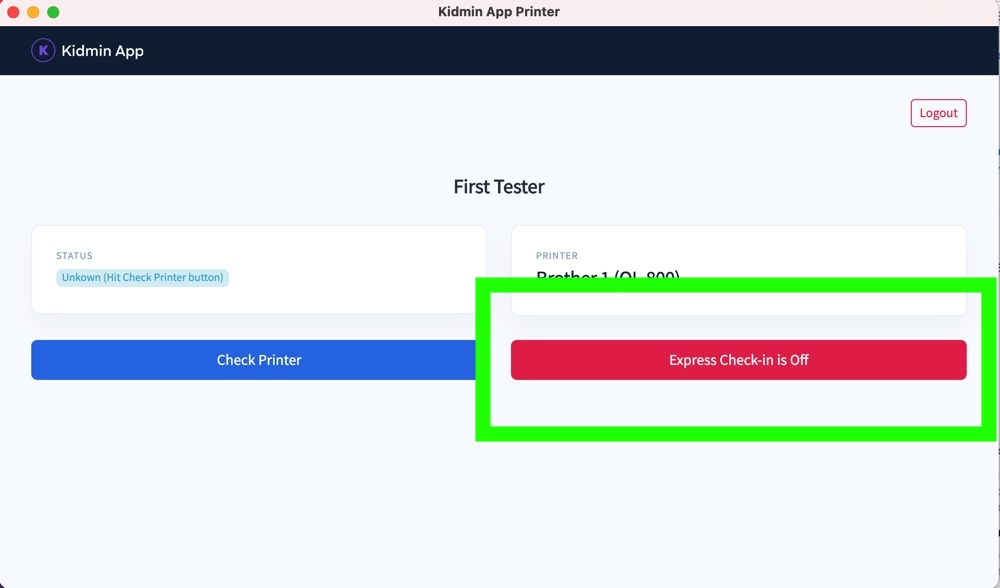
- To enable express checkins, go to the device station and printer you want express checkins to print to. From within the Kidmin Brother printer app, click t he red "Express Check-in is Off" button.
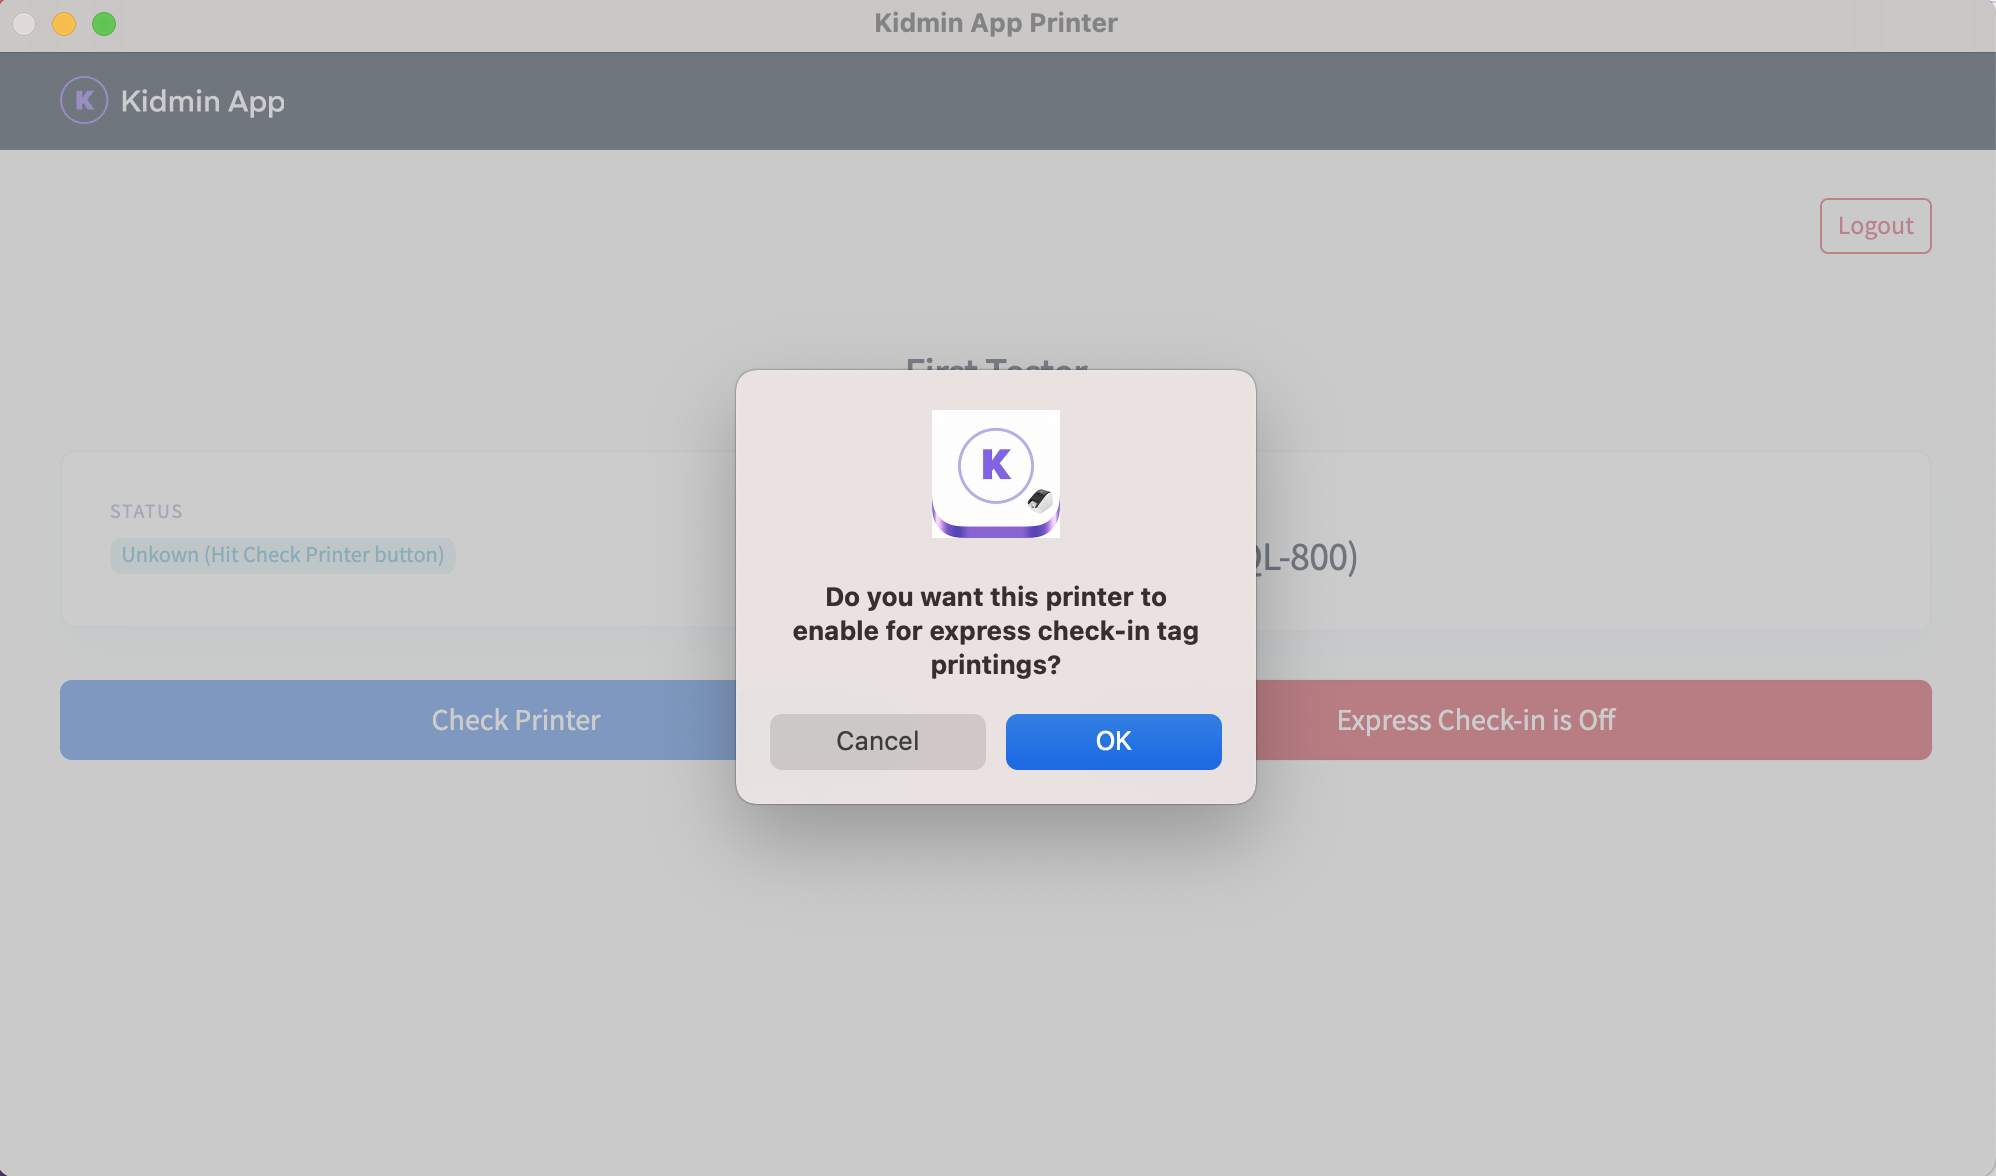
- A message will appear asking you to confirm your action. Click "OK."
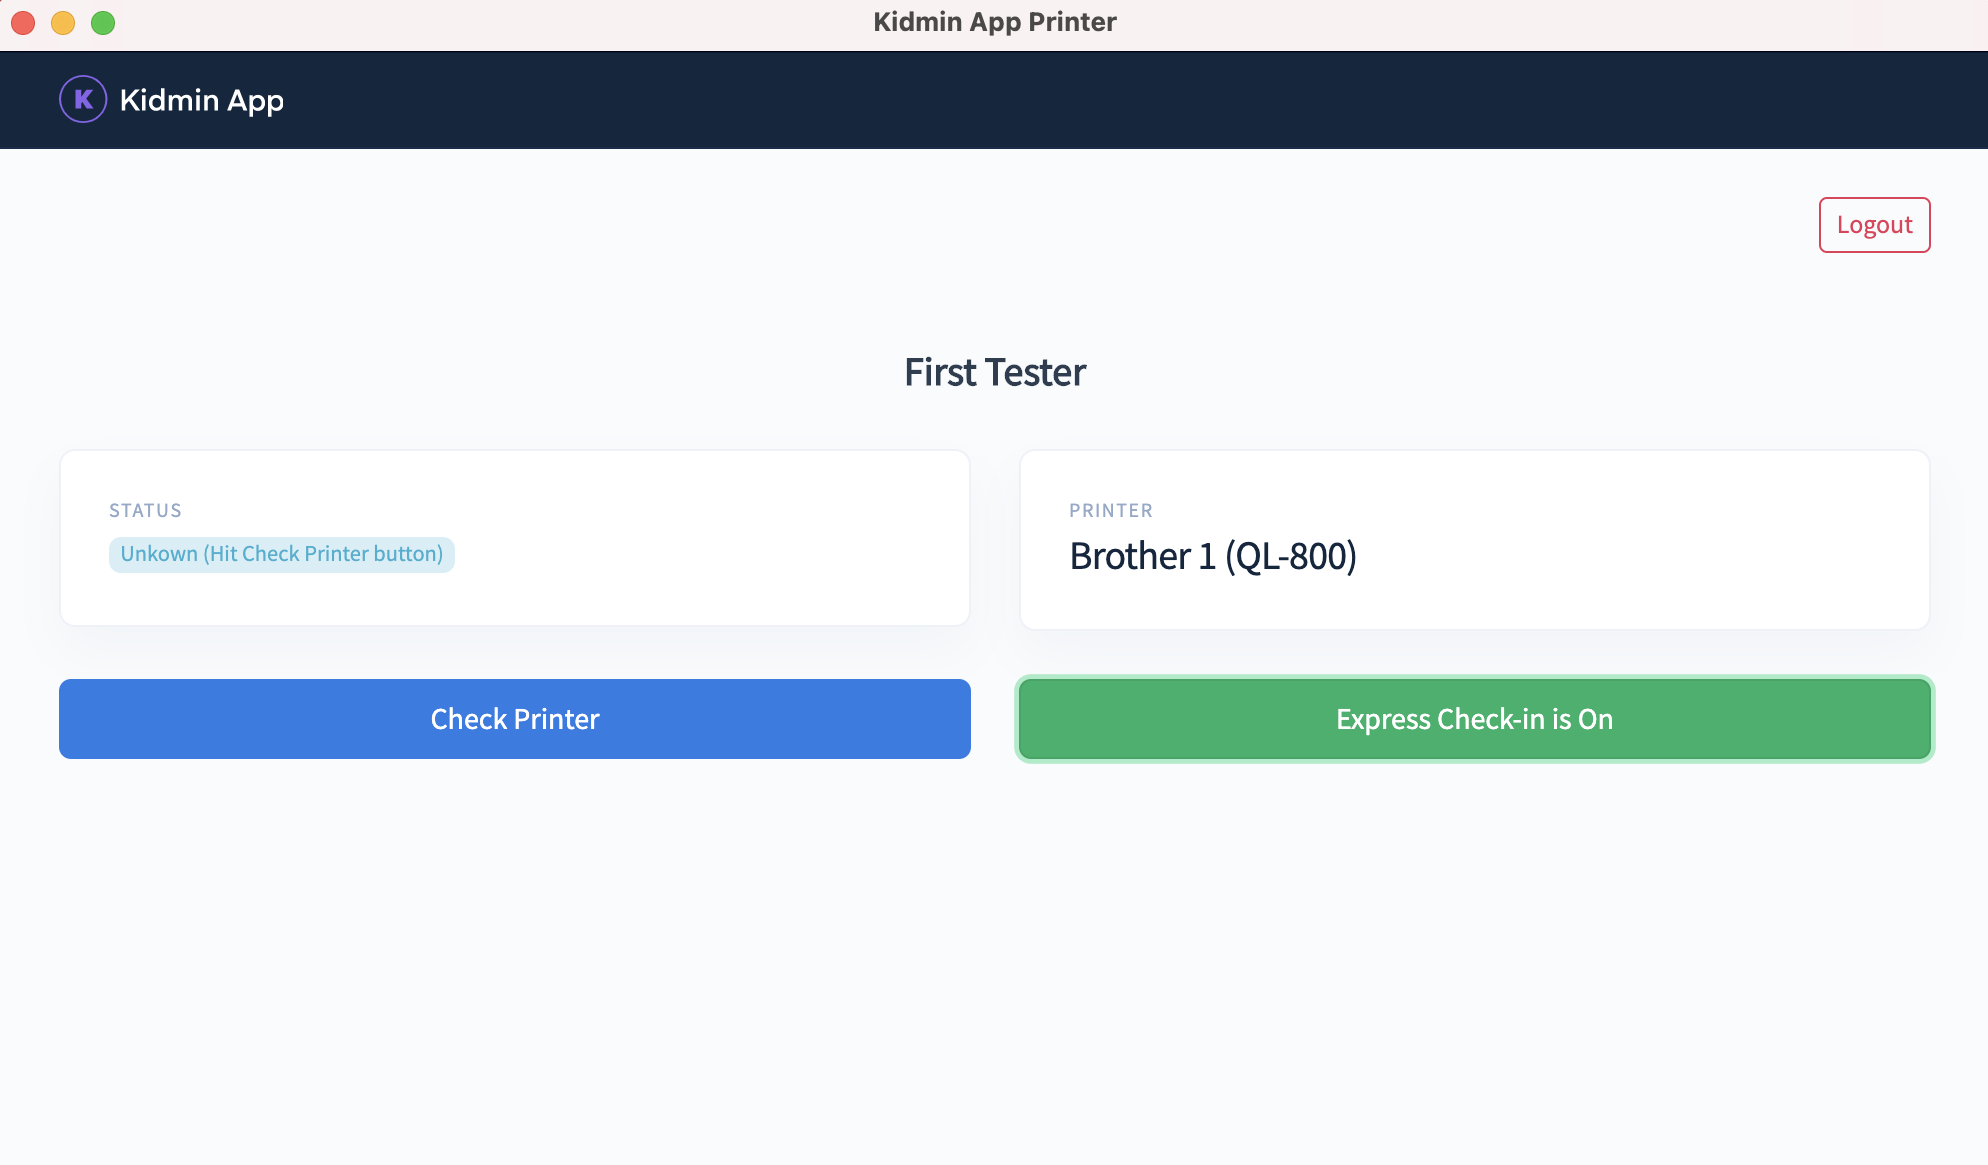
- The express check-in button will switch to green say on. You're all set. Any express checkins tags will print to this printer. **If you run into any issues with future printing, be sure to log out of the Kidmin Printer app and log back in before every service.
If you run into any problems or have a question, please contact us at help@kidminapp.com. We will be happy to assist!
